Follow the instructions below to create a customer in Oracle.
| Step |
Action |
Illustration |
1 |
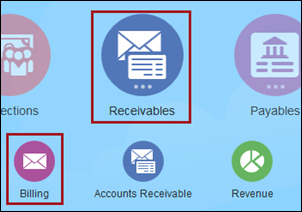
From the Home
screen, click Receivables
and select Billing from the options.
The Invoices page
appears. |
|
2 |
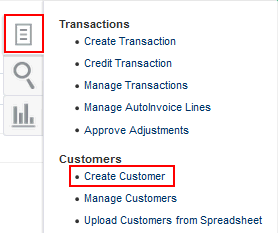
Click the Task icon and in the
Customers section,
select Create Customer.
The Create Organization
Customer page appears. |
 |
3 |
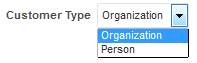
In the Customer
Type field, select Organization
(always select Organization). |
|
4 |
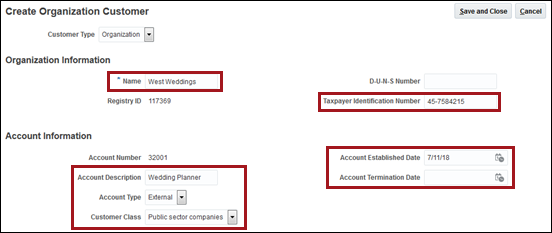
In the Organization
Information section, complete the following fields:
- Name
- Taxpayer Identification
Number
In the Account Information
section and complete the following fields:
- Account Description
- Account Type (Condo
unit owners should select External)
- Customer Class
- Account Established Date
|
|
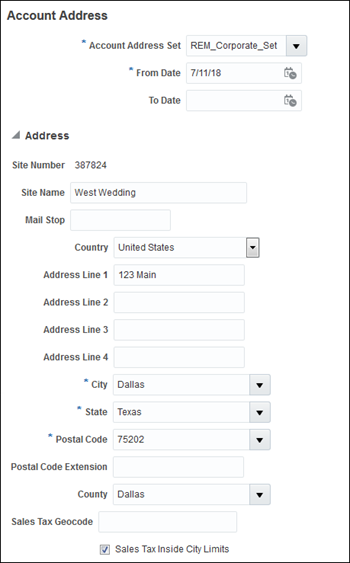
5 |
Scroll to the Account
Address section and complete the following fields:
- Account Address Set
- From Date
- To Date
|

 |
6 |
Scroll to the Address
section and complete the following fields:
- Site Name
- Mail Stop
- Country (defaults
to United States)
- Address Line 1
- City
- State
- Postal Code
- County
|
 |
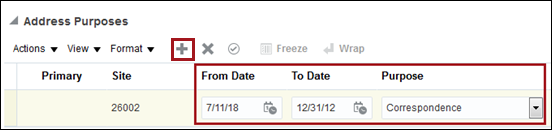
7 |
Scroll to the Address
Purposes section and click the Add "+"
icon. A new Address Purposes line appears with the Site number defaulted.
Complete the following Address
Purposes fields:
- From Date
- To Date
- Purpose (Select
Bill to)
|
 |
8 |
Verify the information is correct
and click Save and Close
at the top of the screen. |
 |