Create ACH and Check Payments
After a Payment Process Request is submitted, a check or ACH payment may be made. The
type of payment required depends on several variables, including site
payment, property, and/or invoice requirements.
This topic provides the steps
for creating both printed and electronic payment files. Click Create
an Electronic Payment File to view the instructions at
the bottom of this screen.
Printed files require the following tasks to make sure the files are
printed and processed correctly. The following tasks are covered
in the tables below:
Create Printed Payment Files
Follow the steps below to create a Printed
Payment File:
| Step |
Action |
Illustration |
1 |
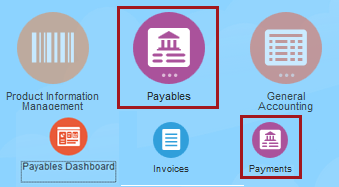
From the Dashboard,
click Payables and select
Payments.
The Overview
page appears. |
 |
2 |
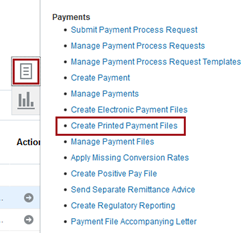
On the right side of the screen,
click the Task  icon and select Create Printed Payment Files. icon and select Create Printed Payment Files.
The Create
Printed Payment Files process page appears. |
 |
3 |
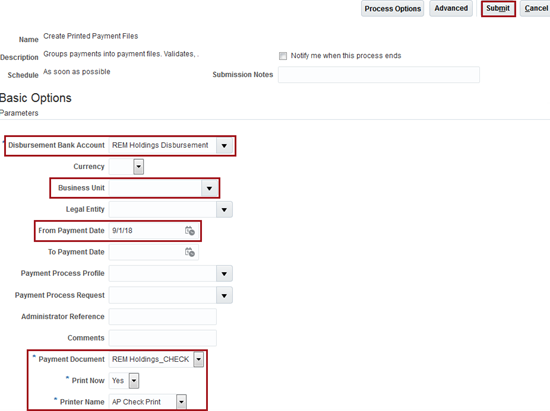
In the Parameters
section, provide the following information:
- Disbursement
Bank Account (required): Select the bank account from
which funds will be issued.
- Business
Unit: Select the applicable business unit.
- From
Payment Date: Verify or update the payment date.
- Payment
Document (required): Select the type of payment document.
- Print
Now (required): Indicate if the file will be printed
immediately
- Printer
Name (required): Select the desired printer.
Note: Any fields not
listed above are optional and can be completed based on available
parameters.
Scroll to the top of the screen and click Submit.
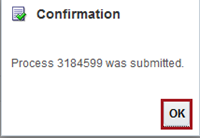
A Confirmation popup
appears indicating the process was submitted. |
 |
4 |
Document the Confirmation Number for
future reference.
Click OK.
The Create
Printed Payment Files process page reappears. |
 |
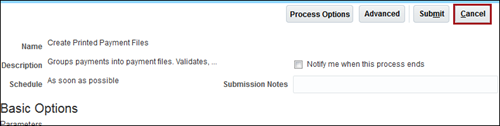
6 |
Scroll to the top of the screen
and click Cancel.
The Overview
page appears. |
 |
7 |
Submitting the form above creates
the following files:
- Format
Payment Files
- Create
Printed Payment Files
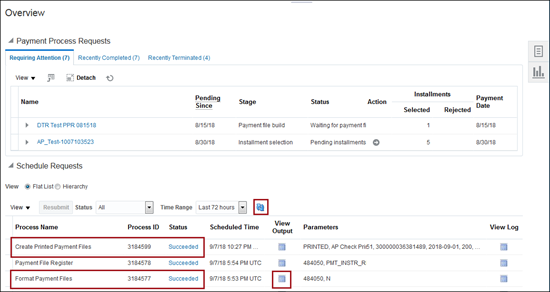
In the Schedule
Requests section, click the Refresh
 icon until the files are listed. icon until the files are listed. |
 |
View Payment File Formatting
Follow the steps below to view and edit the Payment
Files Format:
| Step |
Action |
Illustration |
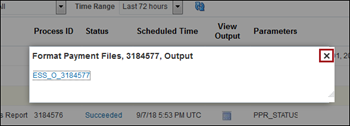
1 |
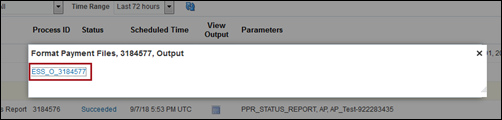
In the
Format Payment Files process row, click the
View Output icon.
The
Format Payment Files popup appears. |
|
2 |
Click the linked file.
An Open File
popup appears. |
 |
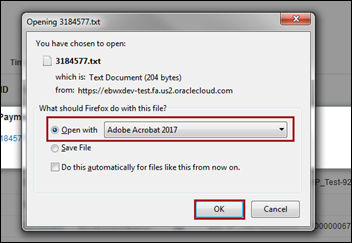
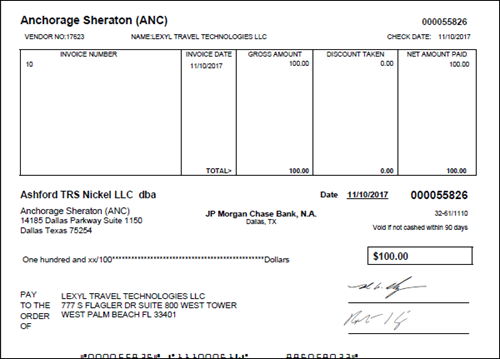
3 |
Select the desired program to
open the file and click OK.
The file opens, and all properly formatted
checks appear. |
 |
4 |
Ensure all checks printed correctly,
and if desired, use the program's available tools to save or print
the file.
When finished reviewing, close the file.
The system returns to the Format
Payment Files popup. |
 |
5 |
Close the Format
Payment Files popup.
The Overview
page reappears with the current list of scheduled processes. |
 |
Submit Payment Files for Printing
Follow the steps below to submit the payment files for printing:
| Step |
Action |
Illustration |
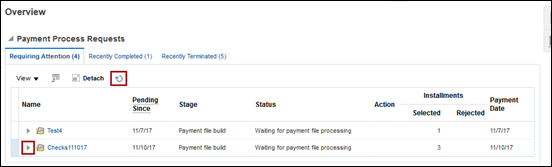
1 |
From the Overview
screen, in the Payment
Process Requests section at the top of the screen, click
the Refresh icon until
the applicable process request appears in the list.
Click the arrow to the left of the request to
view the Payment File
row. |
 |
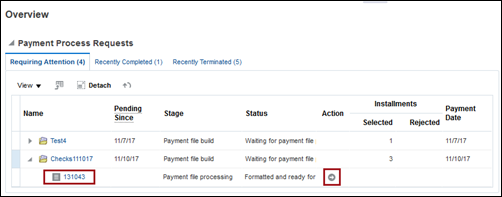
2 |
In the Payment
File row, click the Action
 icon. icon.
The Record Print
Status screen appears. |
 |
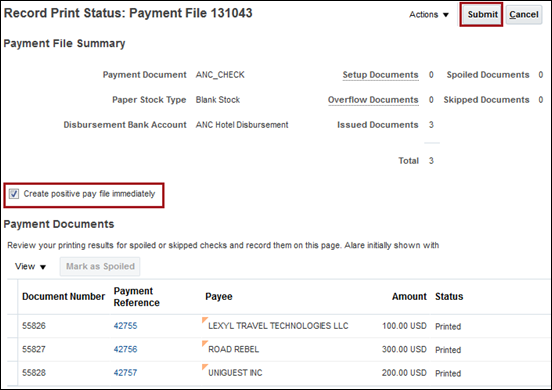
3 |
Ensure the Create
positive pay file immediately check box is checked.
Click Submit.
A Warning
popup appears indicating payments should only be confirmed if
they are:
Payments cannot be reversed. |
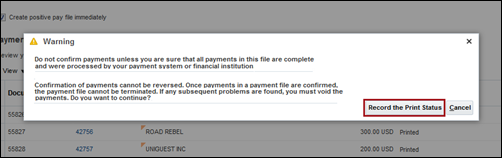
 |
4 |
Click Record
the Print Status.
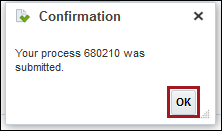
The system returns to the Overview screen and a
Confirmation
popup appears. |
 |
5 |
Document the confirmation
number for future reference.
Click OK.
The payment file shows the status
Printed.
|
 |
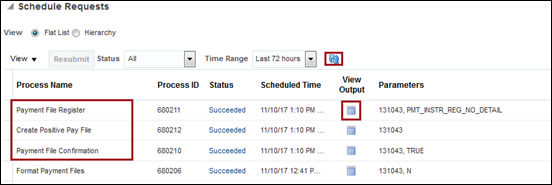
6 |
Scroll to the Schedule
Requests section and click the Refresh
icon.
The Payment
File Register, Create
Positive Pay File, and
Payment File Confirmation processes appear.
|
 |
View the Payment File Register
Follow the steps below to view the payment file register:
| Step |
Action |
Illustration |
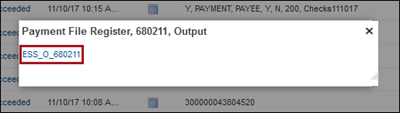
1 |
In the Scheduled
Requests section, find the Payment
File Register row and click the View
Output icon.
The Payment
File Register popup appears. |
|
2 |
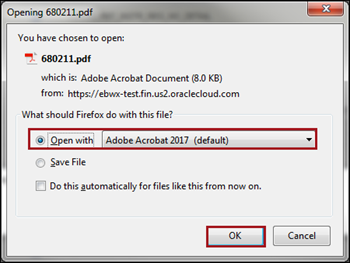
Click the linked file.
An Open File
popup appears. |
 |
3 |
Select the desired program to
open the file and click OK.
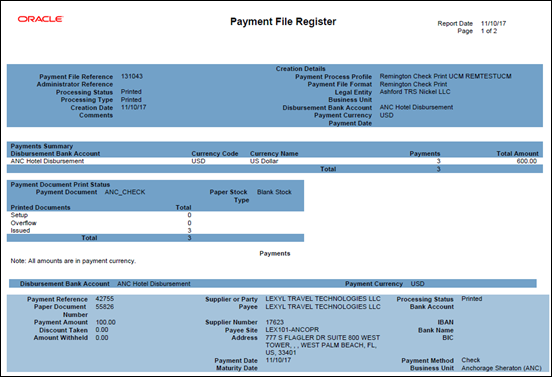
The file opens, and the Payment
File Register appears. |
 |
4 |
Use the program's available tools
to save or print the Register
file.
When finished reviewing, close the file.
The system returns to the Payment
File Register popup. |
 |
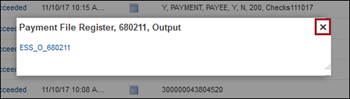
5 |
Close the Payment
File Register Output popup.
The Overview
page reappears with the current list of scheduled processes. |
 |
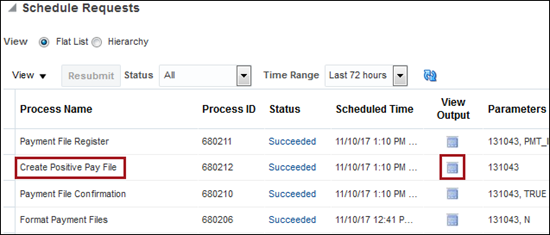
Create Positive Pay File
Follow the instructions below to create the Positive
Pay File.
| Step |
Action |
Illustration |
1 |
In the Create
Positive Pay File row, click the View
Output  icon. icon.
The Create
Positive Pay File Output popup appears. |
 |
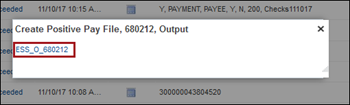
2 |
Click the linked file.
The Open File
pop up appears. |
 |
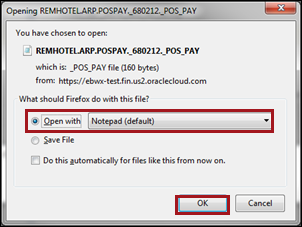
3 |
Select the desired program to
open the file and click OK.
The file opens, and the
Positive Pay File appears. |
 |
4 |
Use the program's available tools
to save or print the file.
When finished reviewing, close the file. The
system returns to the Create
Positive Pay File Output popup. |
 |
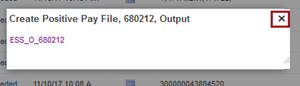
5 |
Close the Create
Positive Pay File Output popup.
The Overview
page reappears with the current list of scheduled processes.
At this point, the process for creating a printed
payment file is complete. |
 |
Use the following steps to create an
Electronic (ACH) Payment file:
| Step |
Action |
Illustration |
1 |
From the Dashboard, click Payables and select Payments.
The Overview page appears. |
|
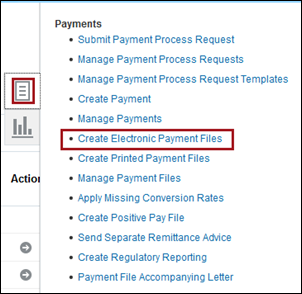
2 |
On the right side of the page,
click the Task icon and select Create
Electronic Payment Files. The Create Electronic Payment
Files process page appears. |
 |
3 |
In the Parameters section, provide
the following information:
- Disbursement Bank Account
(required): Select the bank account from which funds will
be issued.
- Business Unit:
Select the applicable business unit.
- From Payment Date:
Verify or update the payment date.
- Transmit Now (required):
Indicate if the file will be transmitted immediately
Note: Any fields
not listed above are optional and can be completed based on available
parameters. |
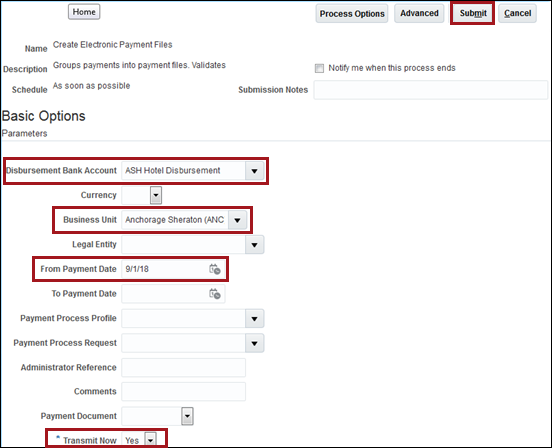 |
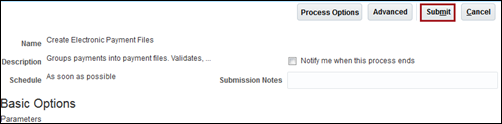
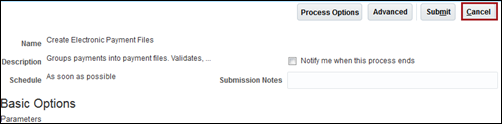
4 |
Scroll to the top of the page
and click Submit.
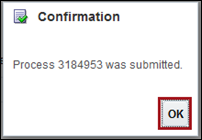
A Confirmation popup appears indicating the process was submitted.
Document the confirmation number for future reference. |
 |
5 |
Click OK.
The Create Printed Payment Files process page reappears. |
 |
6 |
Scroll to the top of the page
and click Cancel.
The Overview page appears. |
 |
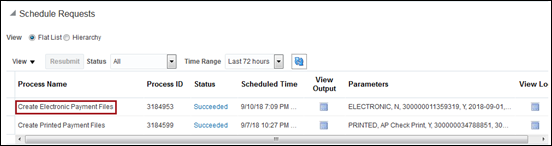
7 |
In the Schedule
Requests section, click the Refresh icon. The Format
Payment Files,
Create Electronic Payment Files, Payment
File Register, and Transmit
Payment File processes are listed.
At this point, the process for creating an electronic
(ACH) payment file is complete.
To retrieve payment files from WebCenter
Content for preparation for bank transmittal, see Retrieve
Payment Files from WebCenter Content. |
 |
Updated 9/19/2018 JM