Update Suppliers for Single Use Account (SUA)
When a new Payment Method and
Payment Process Profile have been
created, the Payment Method Attribute
need to be added to the Supplier Profiles.
When the Payment Method
only applies to a few suppliers, it can be updated directly in each supplier's
profile. However, if all suppliers need to be updated, click the
link for instructions on Updating
Multiple Suppliers using a Template.
Manually Update Supplier Profiles
Once the Business Unit is added
to the Payment Process Profile,
then the payment type can be added to the Supplier
Profiles.
| Step |
Action |
Illustration |
1 |
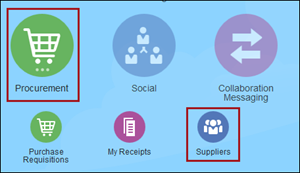
From the Home
screen, select Procurement
and click Suppliers.
The Suppliers
Overview screen displays. |
 |
2 |
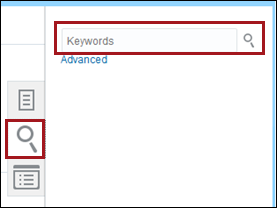
On the left side of the screen,
click the Search  icon to open the Keywords
search field.
icon to open the Keywords
search field.
Enter the full or partial Supplier
Name or Number and click the Search
icon.
The Search Results
display on the screen. |
 |
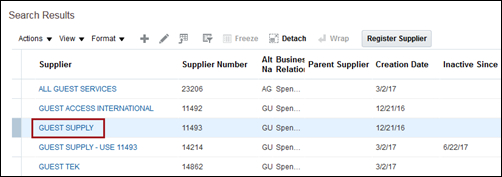
3 |
From the
Search Results list, click the name of the Supplier
to be updated. |
 |
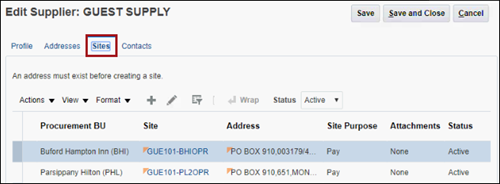
4 |
On the Edit
Supplier screen, click the Sites
tab to see the list of sites.
NOTE:
To see Supplier Sites,
the user must have the Procurement
Agent role.
Click the Site
from the list.
The Edit Site
screen displays. |
 |
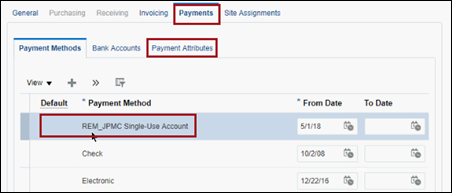
5 |
On the Edit
Site screen, click the Payment
tab.
In the Payment
Methods section, find the payment method just added.
Click the Payment
Attributes tab. |
 |
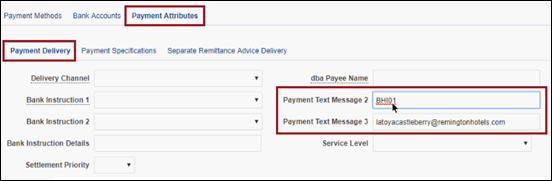
6 |
On the
Payment Attributes tab, in the Payment
Delivery section complete the following:
- Payment
Text Message 2: Enter the
Payment ID
- Payment
Text Message 3: Enter the Supplier's remittance email address.
For multiple email addresses, separate them with the
| character.
The correct data for these fields is located
in the Production Supplier Site
list. |
 |
7 |
Scroll back to the top of the
screen and click Save and Close. |
 |
8 |
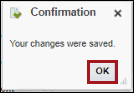
A Confirmation
window pops up showing the changes have been saved.
Click OK. |
 |
Update Suppliers for SUA Using a Template
When the Payment Method needs
to be updated to a number of Suppliers
at one time, the information can be imported using an Excel spreadsheet.
Generate the Supplier Site List Report
Use the following steps to get the Supplier
list.
| Step |
Action |
Illustration |
1 |
To start the process, generate
the Supplier Site List. This list will contain
information that can be cut and pasted into the spreadsheet.
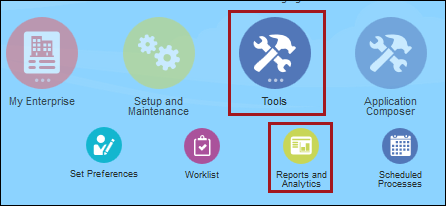
From the Home
screen, click Tools and
select Reports and Analytics. |
 |
2 |
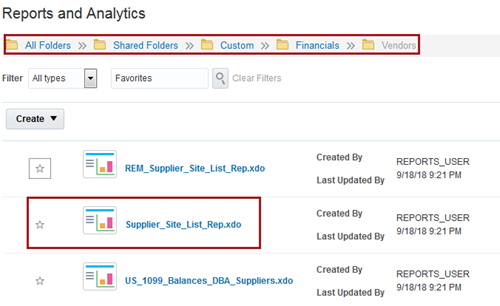
On the Reports
and Analytics screen, click the Drill
Down  arrows and select the following
path: arrows and select the following
path:
Shared Folders
>> Custom >> Financials >> Vendors
The reports listed below contain the Supplier
Site List Report.
Click the Report
Name to open the report on screen.
|
 |
3 |
The screen opens to the Oracle Business Intelligence (OBI)
screen, showing the filter options.
For this report, there are no filters.
Click the Apply
button. |
 |
4 |
The report may take up to five
minutes to generate. When it completes, the Open
Supplier Site List Rep Report window displays. 0
Select Microsoft
Excel if it's not already selected.
Click OK. |
 |
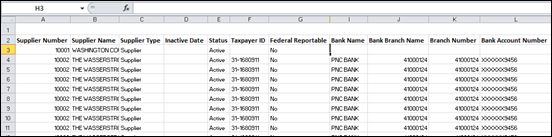
3 |
The Supplier
Site List Report
displays in Excel. |
 |
Create the Supplier Site Interface Spreadsheet
Use the following steps to create the Supplier
Site Interface spreadsheet.
| Step |
Action |
Illustration |
1 |
Open the Supplier
Site Interface template spreadsheet.
NOTE: If
you don't have the template file, please
submit a request to the Service Desk. |
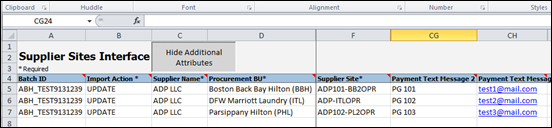 |
2 |
Use the Supplier
Site List Report list to get the following information:
- Batch ID
(Column A): Create a unique
alphanumeric identifier for the batch
- Import
Action (Column B):
Select Update.
- Supplier
Name (Column C):
Copy and paste the Supplier Names from the list.
- Procurement
BU (Column D): Copy
and paste the Procurement BUs from the list.
|
 |
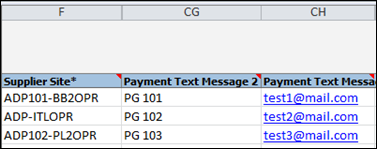
3 |
Continue adding the following
information:
- Supplier
Site (Column F): Copy and paste the
Supplier Sites from the report.
- Payment
Text Message 2 (Column CG): Enter the
Payment ID code.
- Payment
Text Message 3 (Column CH: Enter the Supplier
Remittance email address. If entering more than
one, separate each email address with a | (bar character).
|
 |
4 |
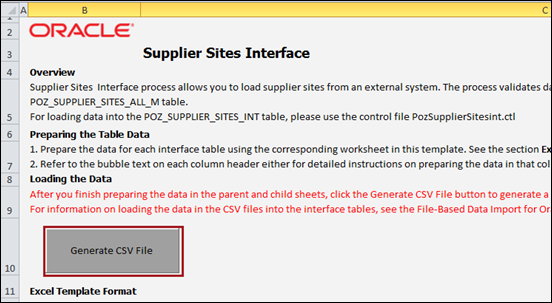
On the first
Instructions and CSV Generation tab, click the
Generate CSV file button.
A .zip file will be generated containing the
information needed to import.
Save the file to your computer's desktop. |
 |
Upload the Supplier Site Interface Spreadsheet
Use the following steps to upload the
Supplier Site Interface spreadsheet.
| Step |
Action |
Illustration |
1 |
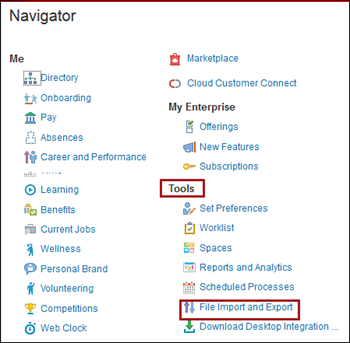
Open Oracle,
and from the Home screen,
click the Navigator Menu  icon.
icon.
In the Tools
section, select File Import Export.
The File Import
and Export screen displays. |
 |
2 |
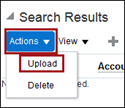
On the File
Import and Export screen, scroll down to the Search
Results section.
Click the Actions
menu and select Upload.
The Upload File
pop up window displays. |
 |
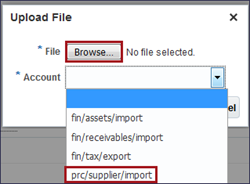
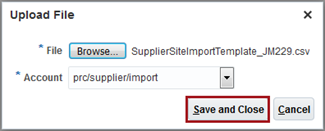
3 |
On the Upload
File pop up, click Browse
to locate the .zip file on the computer desktop.
Click the Account
arrow and select prc/supplier/Import
from the list. |
 |
4 |
Click
Save and Close. It may take a few moments to upload
the file.
The window closes and the file is shown listed
on the screen. |
 |
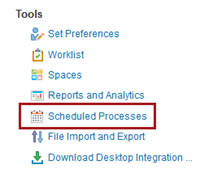
5 |
Click the Navigator
Menu button. Click Tools
and select Scheduled Processes. |
 |
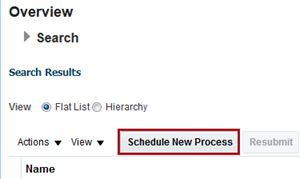
6 |
On the
Scheduled Processes Overview screen, click the Schedule
New Process button below the Search
Results area.
The Schedule
New Process pop up window displays. |
 |
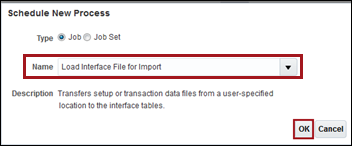
7 |
In the Schedule
New Process window, click the Name
arrow.
Search the Process
Names list and select Import
Supplier Sites.
|
 |
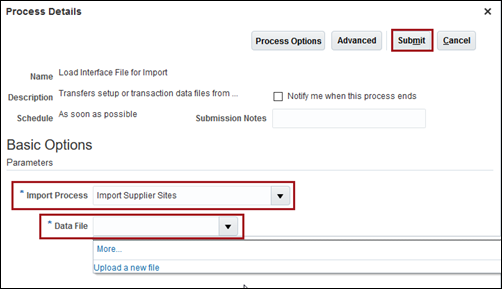
8 |
In the Process
Details screen, select the following:
- Import
Process: Search and select Import Supplier Sites
- Data
File: Select the Uploaded
file. It should be in the list.
Click Submit.
A Confirmation
pop up window displays showing the
Process ID. |
 |
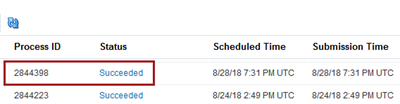
9 |
The process may take a few moments.
Click the Refresh  icon until the Status
shows Succeeded.
icon until the Status
shows Succeeded.
When completed look for the Process
ID in the Processes List
on the Overview
screen
If the status errors, there will be an icon.
Click the icon to get the log. It will have information
on what did not process. |
 |
Import the Data
Once the data has been uploaded and processed, the data can be imported
into the Supplier's Profiles. Use the following steps to import
the data and validate the import.
| Step |
Action |
Illustration |
1 |
From the Home
screen, click Procurement
and select Suppliers. |
|
2 |
At the right of the screen, click
the Task  icon. Select Import Suppliers. icon. Select Import Suppliers.
The Import Suppliers
screen displays. |
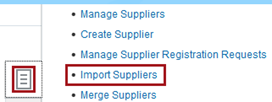 |
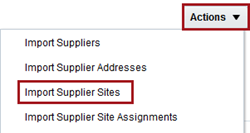
3 |
On the Import
Suppliers screen, click the Actions
menu and select Import Supplier
Sites.
The Process
Details screen displays. |
 |
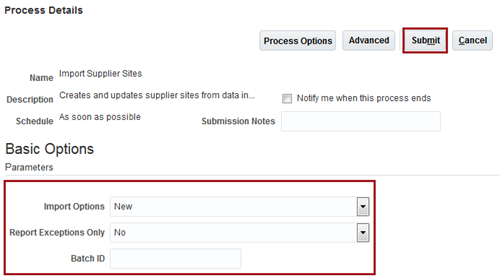
4 |
On the
Process Details screen, select the following options:
- Import
Options: Select New
- Report Exceptions
Only: Select No
- Batch
ID: Enter the Batch
ID used in the zip file creation.
Click Submit.
When completed the Process ID will be listed on the Import Suppliers
screen. |
 |
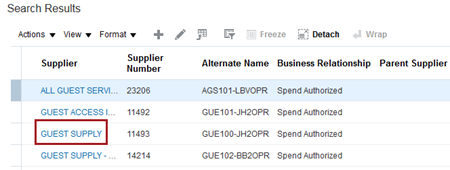
5 |
To
Validate the Import:
Search for a Supplier
from the file just processed. |
|
6 |
Click the Supplier
Name in the Search
Results list.
The Edit Supplier
screen opens. |
 |
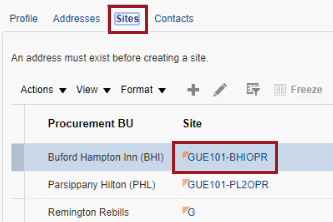
7 |
Click the Sites
tab.
From the list of sites, click the Site
code.
The Edit Site
screen displays. |
 |
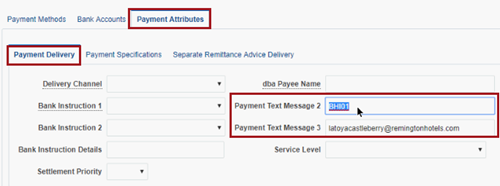
8 |
Scroll down to the
Payment Attributes tab.
In the Payment
Delivery section, validate the information in Text
Message 2 and Text Message
3 matches the information in the spreadsheet. |
 |
Updated 11/05/2018 JM