After a customer is created in Oracle, the communication
information, profile, and reference accounts are added to the customer.
This information can be added from the
Manage Customers screen.
To add customer information, us the steps below to access the Manage Customers screen.
Step |
Action |
Illustration |
1 |
Sign in to Oracle.
OR
|
 |
2 |
From the Billing screen, click
the Tasks
icon on the right and in the Customers menu, select Manage
Customers. |
|
3 |
From the Manage Customers page, enter
the desired search criteria then click Search.
Note:
The parameters with two asterisks (**) are required and at least
one must be used when searching for a customer.
In this example, the
name of the customer is used. |

|
4 |
The Search
Results matching the entered criteria display on
the screen. |

|
Use the following steps to add profile information
to a customer account.
Step |
Action |
Illustration |
1 |
Locate
the desired customer from the Search
Results list. |
|
2 |
From the
Accounts section, click
the Account Number. |
|
3 |
In the Edit
Account screen, click
the Profile
History tab. |

|
4 |
In the Profile
History
section, select the Actions
menu and click
Correct
Record. |
|
5 |
Edit
the Account Profile information,
as needed.
|
|
6 |
When completed, click Save and Close. |

|
When adding or creating a customer account the
contact information is located in the Account's Communication
tab.
Use the following steps to add contact information
to an account.
Step |
Action |
Illustration |
1 |
Locate
the desired customer. |
See
instructions above. |
2 |
From the
Accounts section, click
the Account Number to
edit the account information. |
|
3 |
Select
the Communications tab
to see the Contacts information. |
|
4 |
In
the Account Contacts,
click the Edit Contacts
button.
|
|
5 |
Click
the Add  icon to create a contact. icon to create a contact. |

|
6 |
In
the Create Contact pop-up,
enter the required information.
After contact data is entered click
OK.
The new Contact
displays on the Account screen. Click Save
and Close to save it again.
Open the account again by clicking
the Account number. |
|
7 |
Scroll down the screen to the
Addresses section.
Click the Add icon. |
|
8 |
In the Create
Address screen, enter the account's address.
Note:
Enter the postal code to automatically populate the City and State
parameters. |
|
9 |
In
the Address
Purposes
section, click the Add
icon.
Add the Account's Purpose
and Date
into the fields provided.
Select
OK. |

|
10 |
Scroll up to the Contact Points
section.
Set the Type parameter
as Phone.
Click the Add icon. |
|
11 |
Configure
the phone number parameters.
Click OK. |
|
12 |
Click
Save and Close. |
|
Use the following steps to add Reference
Account information to a site.
Step |
Action |
Illustration |
1 |
Locate
the desired customer. |
See
instructions above. |
2 |
Click the Site
Number. |
|
3 |
From the Edit
Site page, click the Site
Details tab. |

|
4 |
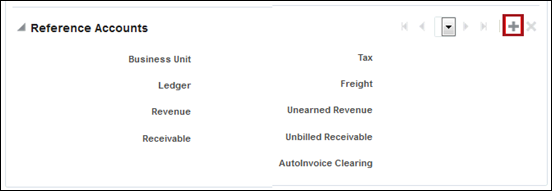
Scroll to the Reference
Accounts section.
Click the Add icon. |
|
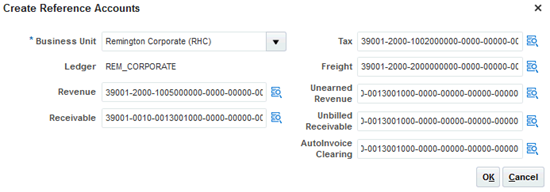
5 |
Configure
the Business Unit parameter.
Click the Revenue Search  icon.
icon.
|
|
6 |
Enter the Company
information.
Select Search. |
|
7 |
Select the desired Revenue
account combination.
Click OK. |
|
8 |
Repeat
the account configuration process for each desired account.
When all accounts are set, click OK. |
|
9 |
Click
Save and Close. |
|
You may assign
communications to a site. The process follows the same steps as assigning
communications to an account (see Assign
Communications to a Customer Account),
except, initially a site is selected instead of an account.
Perform the following procedure to open site
communication details.
Updated 9/20/2018 JM